A while back, I made a list of the five things I hated most about my 2003 Porsche 911 Carrera, aka the 996. When I mentioned that I was not too fond of how the brake pedal felt, many of you commented that something must have been wrong with them. Other than needing a fluid change, there wasn’t anything mechanically amiss, but I still didn’t love how the pedal felt long and a little spongy, so I resolved to do something about it.
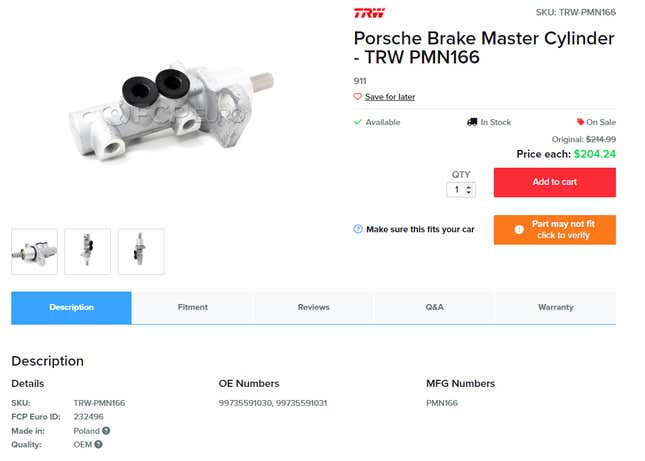
Exactly what I was going to do about it took a little research. I knew I needed to replace the fluid, so that was an ideal time to replace what certainly appeared to be the original rubber brake lines with some nice braided stainless lines from Goodridge. If I were going to do that, then maybe it would also be a good idea to try to change out the brake master cylinder with one meant for a 997 GT3, something that folks on Rennlist and other forums said should make a difference in pedal feel but not change the force transmitted to the calipers, thus avoiding any anti-lock brake wonkiness.
To line up these parts, I once again reached out to the incomparable folks at FCP Euro, who very kindly provided the parts for this job, a Motive Power Bleeder and some new brake caliper bolts (more on that in a second).
Also on my list of most-hated 911 things was the car’s annoying-ass wheel bolts. I figured this would be as good a time as any to upgrade to wheel studs and nuts, and if I was going to do that, I should get some wheel spacers to fix the car’s stance. For those, I went to Porsche specialist Rennline.

Rennline was my go-to for this because first, the stud and nut kit they offer had the right stud length for my preferred wheel spacer thickness (15mm all around). Secondly, the wheel studs they use have a hex head, meaning that installing them and then torquing them to 30 lb-ft was super easy with the appropriate Allen head bit. Considering I plan on checking the studs’ torque whenever the wheels are off, this convenience is a big deal.
I also went with Rennline for the wheel spacers because it specializes in Porsche parts, so their hub-centric spacers fit perfectly with no looseness or rattling. They also fit the wheels perfectly and are incredibly nicely milled from aluminum and anodized black. There are tons of spacers on the market, but getting them from a company familiar with Porsche’s quirks made the most sense. Even better, the menschen at Rennline sent me the parts gratis, which I appreciate the hell out of. They also sent me a four-piece adjustable pedal set, which is getting installed very soon, so keep an eye out for that story soon.
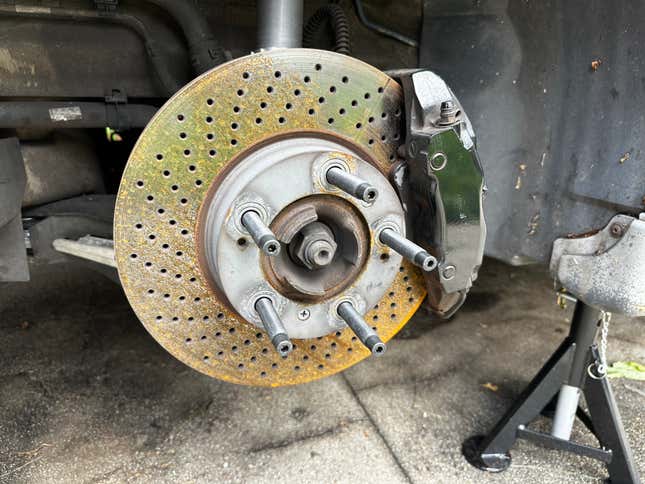
So, once I got the car up on its jack stands using the least sketchy method I found on YouTube, I used an impact gun to remove the wheel bolts and got to work. The first thing I opted to do to ease myself into things was the wheel stud conversion. This is seriously easy, and Rennline provides instructions that make it more or less idiot-proof. It’s simply a matter of winding the studs in by hand and either having a friend step on the brakes or using a pry bar to stop the hub spinning before torquing them to 30 lb-ft. That’s it. No messy threadlock and no need to double-nut the studs to wind them in.
Not to blow your mind or anything, but this modification rules. Not only do the studs make hanging the wheels easier than dealing with the little wheel guide tool in the tool kit, but they look rad, too. The longer studs also mean there’s plenty of meat for the nuts to grab onto with the spacers, which slip on over the studs. No need for extra centering rings or anything; they center perfectly and sit flat so long as you’ve wire brushed your hub to get rid of any corrosion.
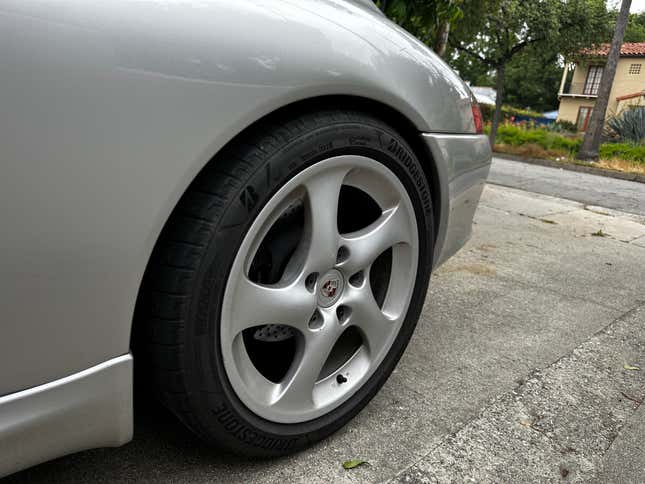
As an aesthetic modification, this one was huge. My stock wheels now perfectly fill the wheel wells, and even with my narrow-body car that’s been slightly lowered, I’ve only experienced tire rub once under very hard compression, and even that was minimal. I recommend Rennline for this stuff if you have a 911 (or Boxster or Cayman, etc.)

With the easiest stuff out of the way, it was time to get messy and do the brake lines. Now, I prepared as best as I could to do this job by hitting all the fittings with WD-40 ahead of time and buying the appropriately sized flare wrenches, and even then, this almost went very, very badly. Keep in mind that my car has been a California car its whole life, so there’s no appreciable corrosion. Still, I got seven of the eight fittings for the brake lines off with only a few close calls. Then I got to the last fitting, and it all fell apart.
This last brake fitting was the inside junction between the hard line that goes to the ABS pump in the frunk and the soft brake line. I did everything the same as with the others, but apparently, this flare nut was made of soft cheese because it just started to round over. Thankfully it didn’t round over completely, because replacing that hard line would involve removing the 911's fuel tank and most of the trunk components, along with suspension and steering rack stuff. The line itself was only around $100, but the labor would be a nightmare. As an aside, I wouldn’t recommend Harbor Freight’s Quinn-line flare wrench set. They are too flexible which is what gave me so much trouble.
So, rather than continuing to destroy the fitting, I did some research on what I could do to get this thing undone. I tried a heat gun with PB Blaster, and then I tried a torch. Still nothing. I tried a special set of sway bar end link pliers, and once again, no dice. This was looking grim.
Here’s the thing, though. I’m a 38-year-old man. I’ve been messing with cars for over 20 years, and I’ve made enough horrible mistakes where I should have just stopped but went on and ruined something that I now know when to throw in the towel on a job. This was that time.
But first, I figured I’d swap the master cylinder out since the brake system was empty anyway. So, I pulled some trim off, stuffed some plastic bags and pig mat underneath the master cylinder, and started gingerly removing the brake fittings. Thankfully this was totally drama free. Ditto for undoing the large nuts holding it to the firewall, and pulling the reservoir off. All of this was super easy, especially since my car doesn’t have Porsche Stability Management which would require some adapting of fittings and leave a light on the dash.
The last thing to do before I called the fellas at House Automotive again was to replace the brake caliper bolts. My car originally came with hex socket bolts. These were superseded years ago by Torx head bolts. Given that Porsche recommends that these bolts get replaced every time the calipers come off, and I’d had them off once to do the suspension, I wasn’t feeling too great about these original-looking units. The replacement bolts also came from FCP Euro, and swapping them out and then torquing the new ones to spec was a breeze.

So, with everything else out of the way, I picked up my phone and called Andy, my service advisor at House Automotive in Pasadena. If you’ve followed the 996 project, you know I’ve used these guys a couple of times before and had awesome experiences, and they were kind enough to finish the last brake fitting for me. It took them around 20 minutes to get the fitting unstuck, and then they filed the fitting down from 11mm to 10mm so that in the unlikely event that I need to remove the fittings again, I can do so.
Lastly, they filled and bled the system for me using Motul’s RBF600 DOT 4 brake fluid, which Motul sent over along with some of their 5W50 300V Competition motor oil (it smells kind of like banana Laffy Taffy, in case you were wondering) for my next oil change. I went with the RBF600 for a few reasons. First, I’ve used it in other cars with great success. Specifically, I switched to it when the US government outlawed ATE Super Blue brake fluid. While it technically has a lower boiling point than some of the other Motul racing fluids, those higher boiling point fluids are more hygroscopic and therefore need changing way more often. The RBF600 will comfortably go two years before needing a change, and I’ve yet to boil it in any car.
The whole song and dance at House involved them keeping the car overnight and resulted in a few hundred bucks in labor charges. Ultimately, I’d rather not have spent that money, but better that than dealing with ruining the brake fitting and having to spend even more replacing the whole hard line.
So, now that all that is done, what is the 911 like to drive? Did this fix my spongy brake pedal? You bet your ass it did. The combination of stainless brake lines and the GT3 master cylinder (which costs well under $300 new at the time of publication) completely transformed how the brakes feel. Before the brakes were strong but took a bit of pedal travel to actuate; now, the pedal is rock solid but still with plenty of modulation to avoid ABS actuation. These upgrades pair well with the stock drilled rotors and the Hawk HPS pads that the previous owner installed last year, and they finally feel like the epic, unflappable brakes that I’ve come to expect from all of Porsche’s vehicles.
In almost 1,000 miles of driving on roads, highways and canyons, I’ve not had any negative experiences to report. The car drives like a much newer and sharper car than the 140k mile bargain 911 I purchased six months ago, and with the exception of a new set of tires, some brake caliper decals and those Rennline pedals, I have no real plans to make further changes in the immediate future.

